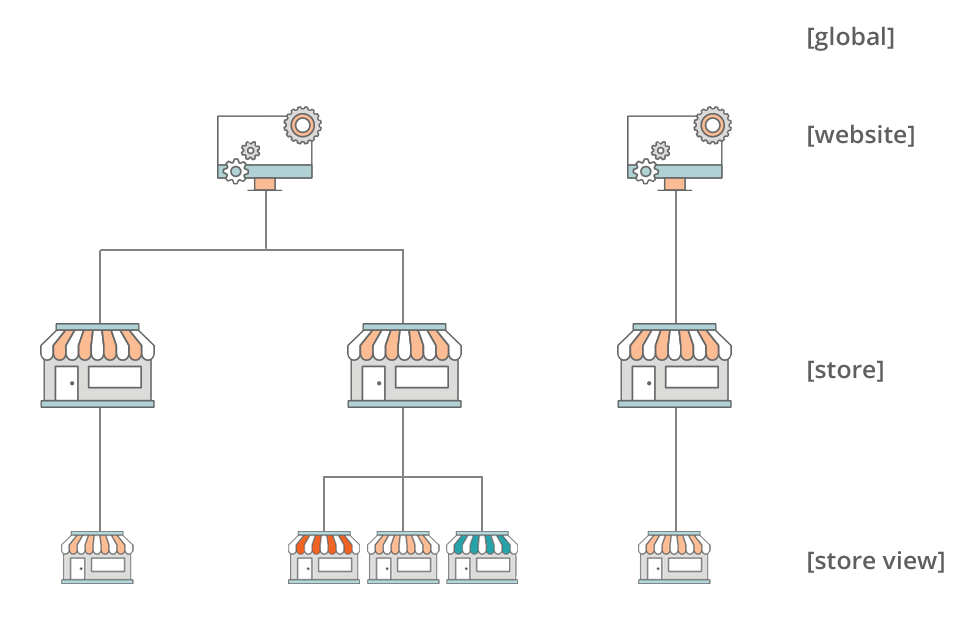
Each online store based on Magento has a hierarchy, which consists of: global view, website, store and store view defining its functioning. In addition, one instance of Magento can have multiple sites, and each site can have multiple stores and store views. This short article will help you define which hierarchy level, e.g. payment, shipping or currency is at.
In this article you will learn:
- What are the differences in individual elements of the hierarchy (global, websites, stores, store views)
- What are the advantages of many stores (multistore)
- How to create a new website, store and store view in the Magento system
Below is an example of how to modify the Magento hierarchy. With the Magento (global) platform, you can define two different websites. Suppose one of them is a clothing store (website 1) and the other is a toy store (website 2). In addition, each of these stores can use different root catalogues and have different store views, for example the view in the British version and the view in the English version.
Source: Magento
Global
At the top of the Magento hierarchy is the global scope, which refers to the Magento installation itself. Defines default values that are common to all stores.
Website
The basis for the installation of the Magento platform are individual websites, which are called the Home Page by default. You can configure multiple sites for one installation, each with its own IP address and domain, which allows you to provide completely different customer service on each page using one administration panel.
What can be defined at the website level:
- maintain a separate customer base,
- create different:
- product prices,
- tax classes
- currency,
- payment options
- shipping options
- product prices.
Store
The store level in Magento is mainly used to manage products and categories. It is possible to create several stores on one website with your own category structure and products. Please note that each store has a separate main category.
What can be defined at the store level:
- various products and categories.
Store view
Each store is presented in accordance with a specific store view. Initially, the store has a single default view, to which you can add additional store views to support, e.g. different languages. Customers can use the language selector to change the store view.
What can be defined at the store view level:
- lets you assign different themes to each view
- lets you customise your payment method naming conventions
Function | Website | Store | Store Views |
Domain | Can be on separate domains | Can be on separate domains | Can be on separate domains |
Prices | Different prices on each site | The same prices | The same prices |
Shipping Methods | They may be different | The same methods | The same methods |
Payment Methods | Different methods | Different methods | Different methods |
Categories | Different main categories | Different main categories | The same main category for all store views |
Products | Various products | Various products | The same products |
Languages | Other languages | Other languages | Other languages |
Advantages of many stores (multistore)
The main advantage is the fact that store owners can easily manage and expand their business with new categories, products and increase their reach by adding new languages (thanks to the store system within a single Magento installation with one administration panel). This greatly facilitates international sales by using local currency and language. Sales data from many stores are stored in one place, which makes reporting easier.
Creating a new website, store and store view in the Magento system
To create an additional website in the Magento system, you must first have two domains (e.g. yuush.com and trade.yuush.com)
Step 1
First, create a new main category.
To do this, you must in the administrative panel in Catalog > Categories, click on Add Root Category, and then name the created main category accordingly.

Step 2
In the Admin panel, go to Stores > Settings > All Stores, click Create Website and then fill in the fields below
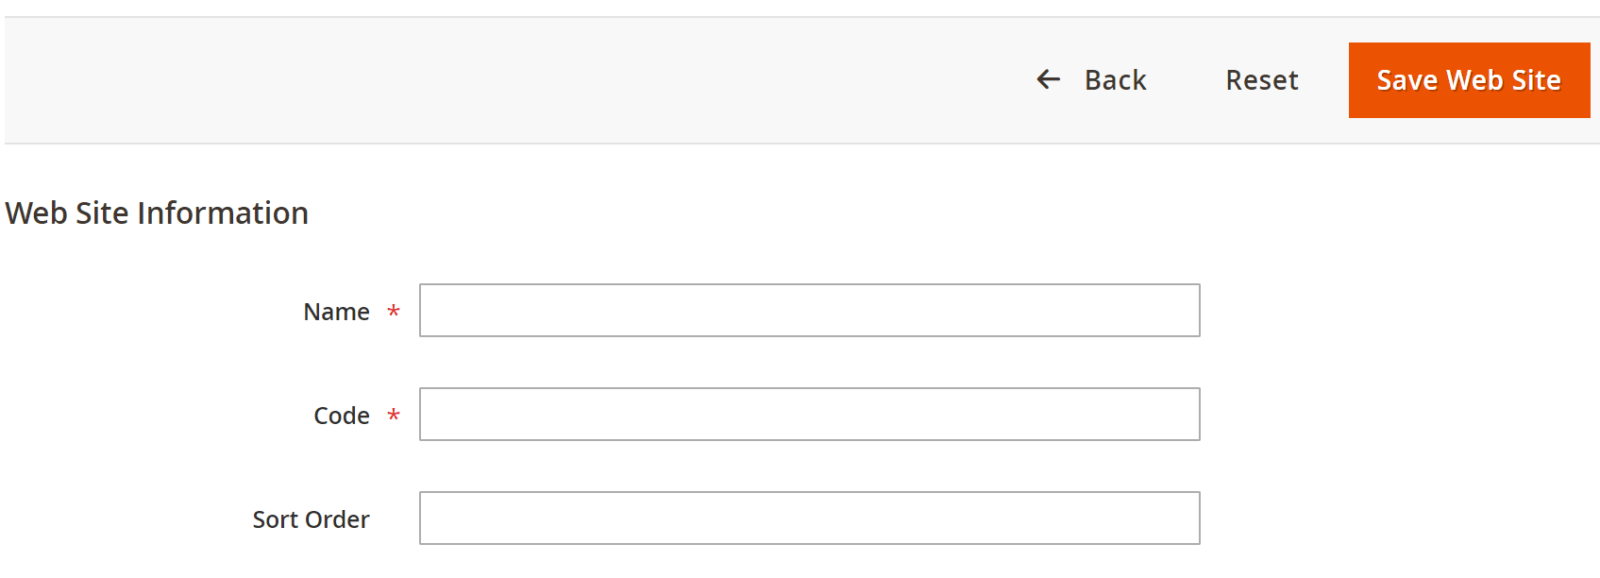
Name – the name of the new website
Code – the unique identifier of the website (used in server configuration files)
Sort Order – priority of the new website.
Step 3
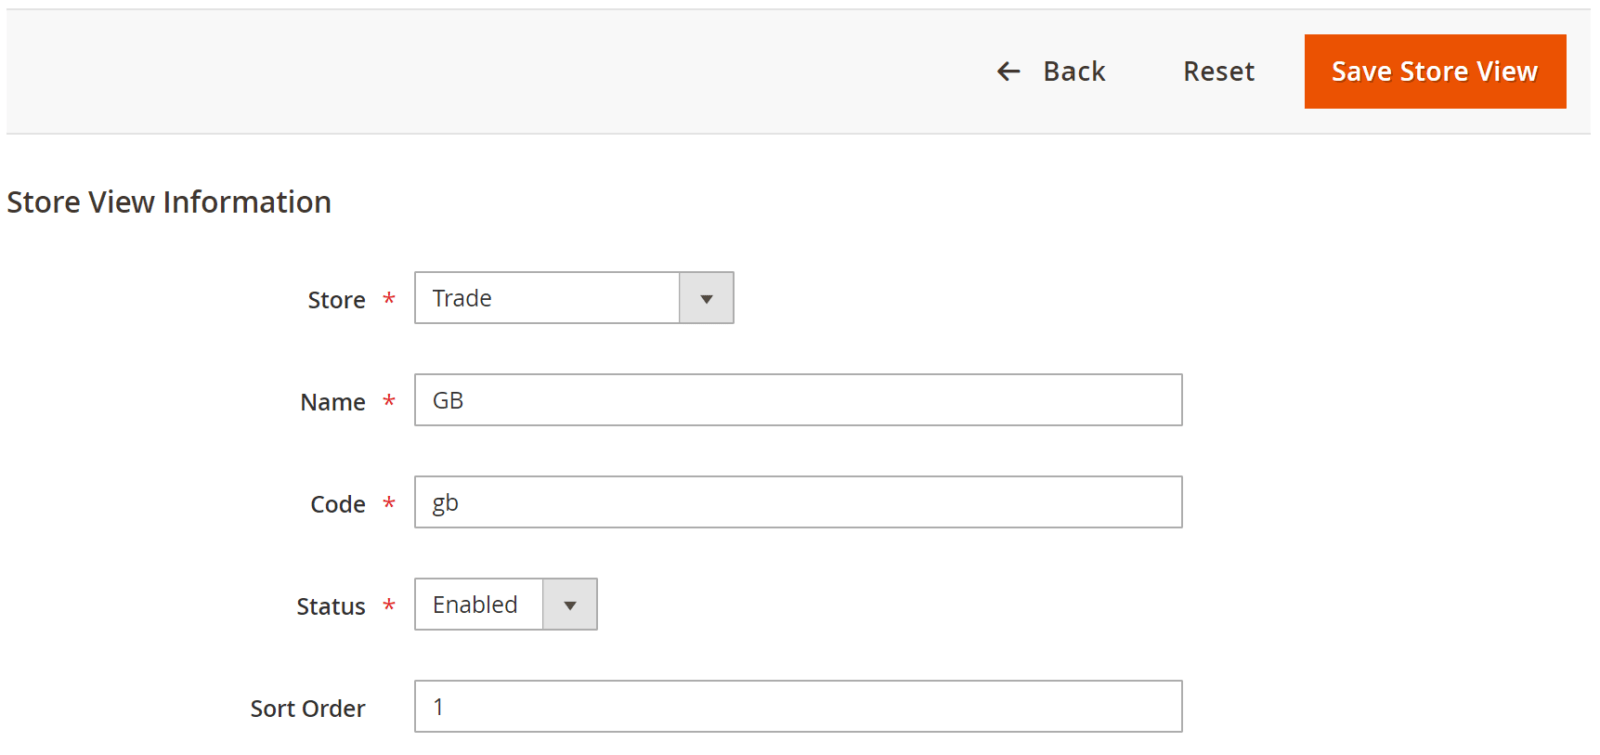
Then create a new store and store view.
Web Site – which site the store will belong to
Name – the name of the new website
Code – the website’s code identifier
Root Category – the main category to which the store belongs

Store – choose which website your store will belong to
Name – the name of the new online store
Code – website code identifier
Status – here you can enable or disable the store view
Sort Order – priority of the new store view
Step 4
The next step is to go to:
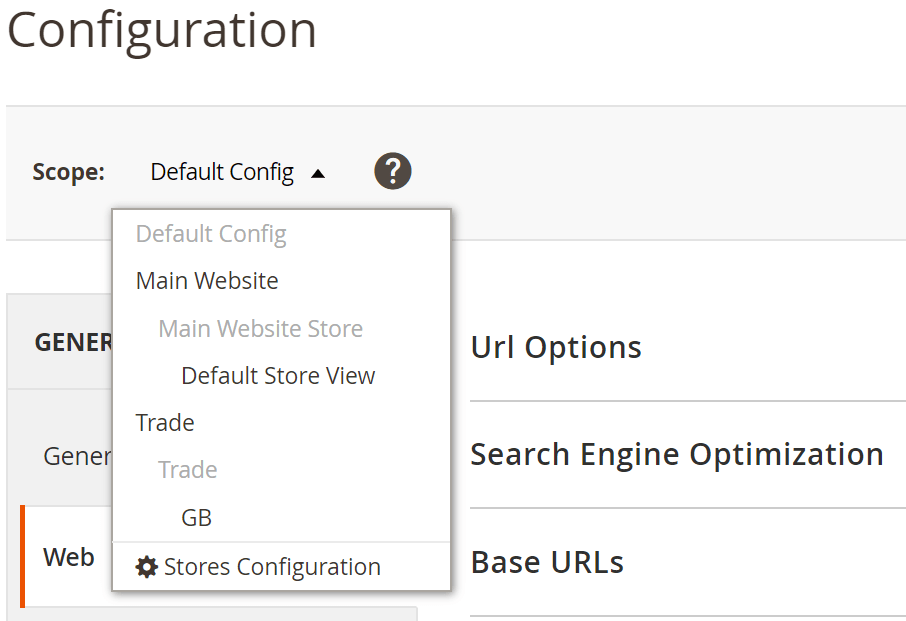
Stores > Settings > Configuration > General > Web
To update the URLs for the newly created site.
Use the drop-down list on the left to select the newly created item.
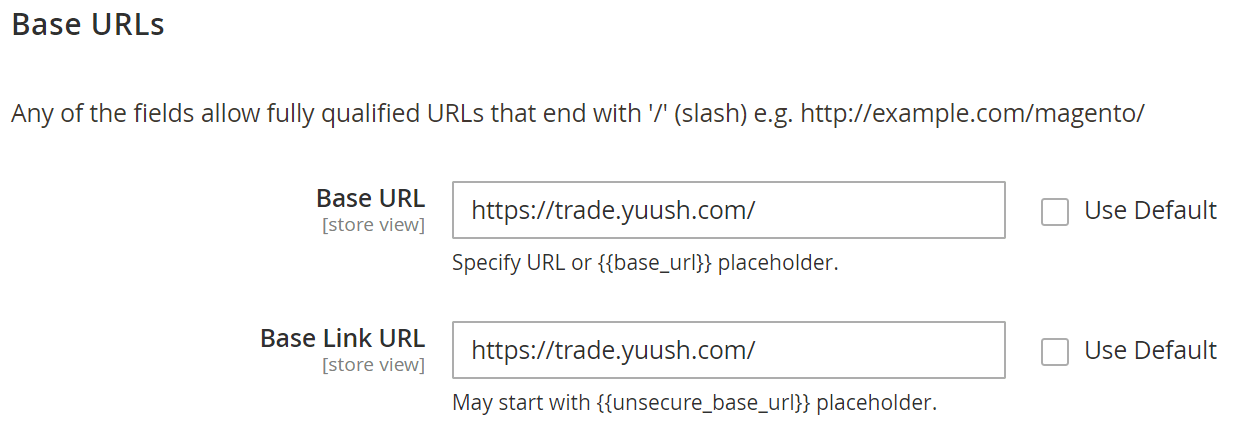
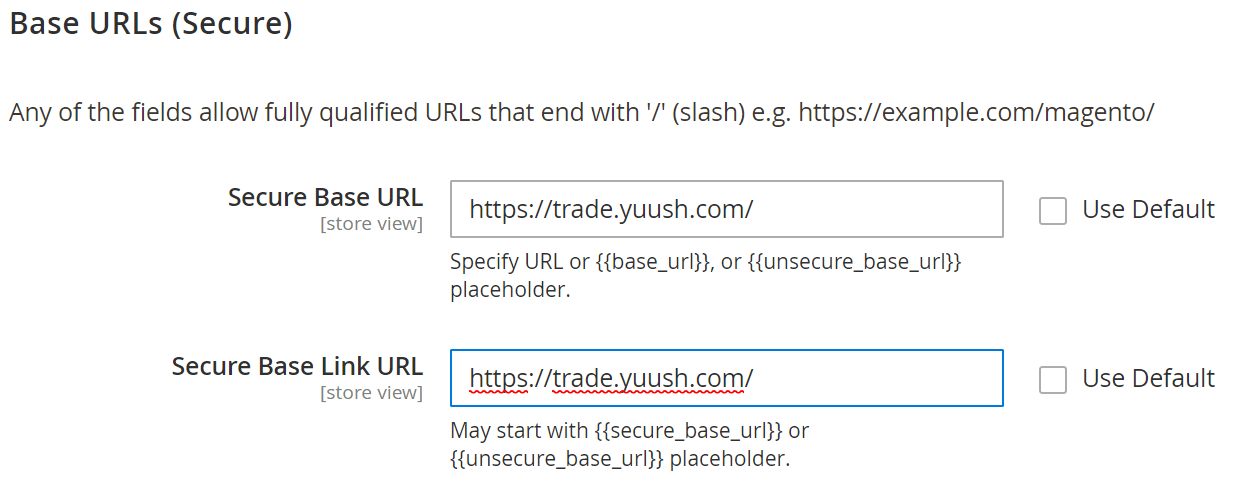
Enter new URLs in the Base URLs and Base URLs (secure) fields.
Then remember to properly configure the server depending on whether you are using Apache or Nginx. The official Magento documentation comes in handy:
Summary
You can run more than just one online store on Magento 2 platform. In addition, each of them can have different main categories, as well as different versions of the view.
By analysing the above-mentioned hierarchy, if you want to build a perfect, prosperous business, the best solution is to choose many Magento stores. Understanding the differences between the three levels (website, store, store view) is a key issue when designing the architecture of the store according to the guide above.


