
One of the ways of attracting price-sensitive customers and boost your sales is offering discounts. In Magento 2 you may setup discounts for individual products (using SPECIAL PRICE option described in a separate article “All you need to know about pricing in Magento 2”) and for all the products which meet certain criteria (using price rules that we will focus on in more detail in this article).
In your admin panel you may create 2 types of price rules: those applied to the catalog page and those applied to the cart.
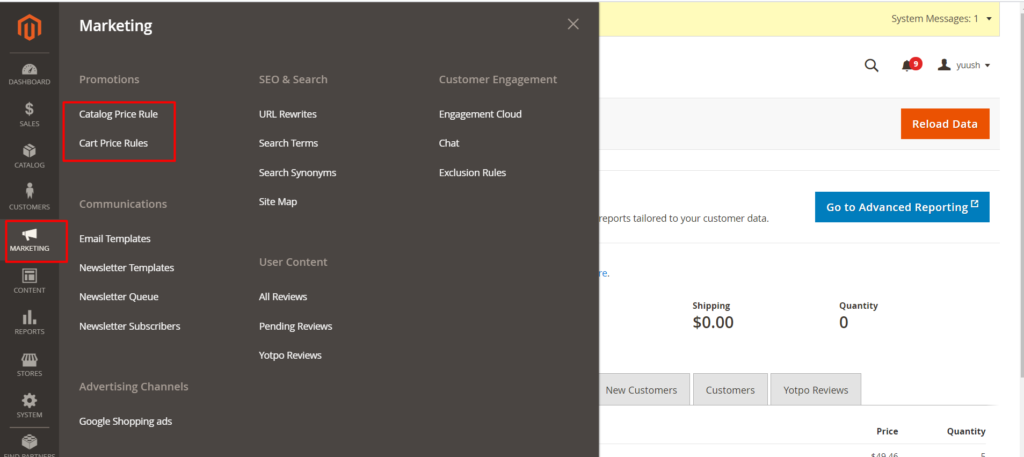
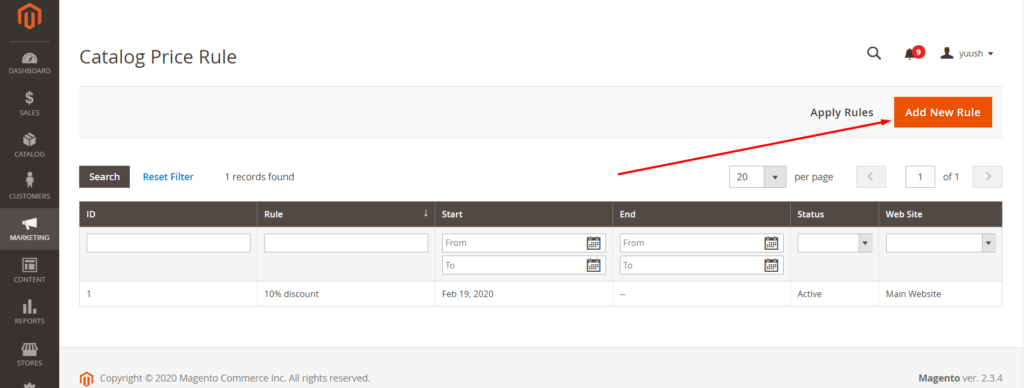
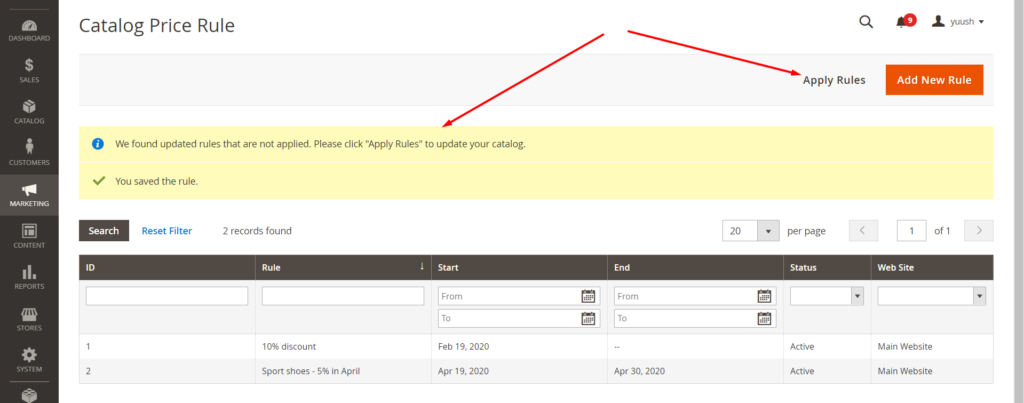
1. To create a rule which will display a discount on the catalog page go to MARKETING in the left sidebar of your admin panel and in section PROMOTIONS choose CATALOG PRICE RULE. Here you may edit existing rules by clicking on them and create a new rule by pressing button ADD NEW RULE.
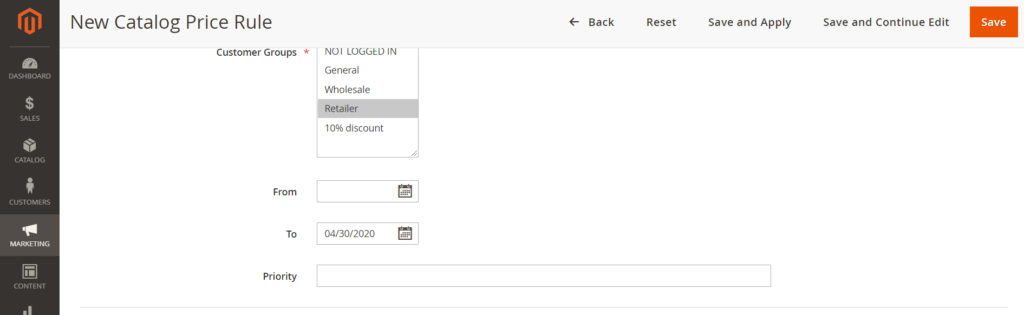
In the opened card of the rule in the first section RULE INFORMATION you need to enter info about the rule, choose store and customer groups for which it will be applied.
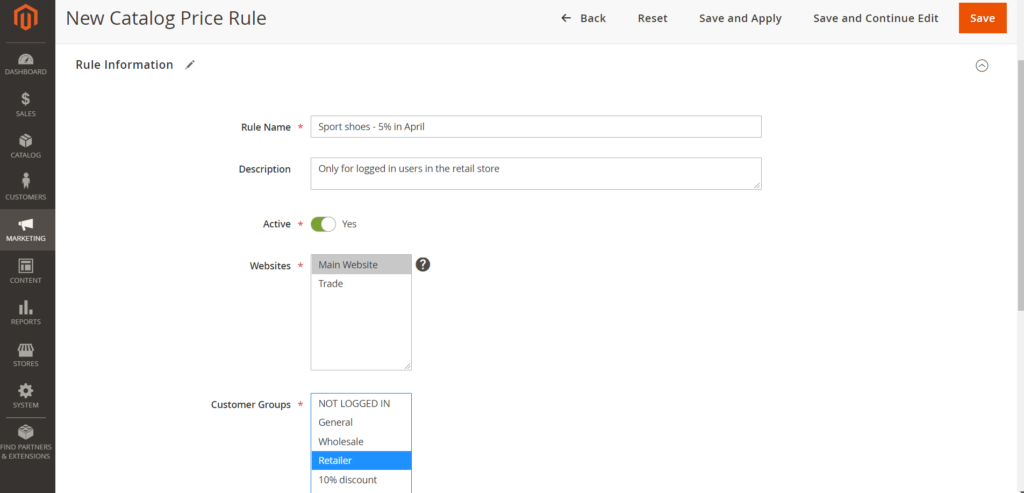
Also here you may set dates when the rule is in effect and prioritize the rules. If the product meets the conditions of several rules, the rule with the highest priority (the highest is 1) will be applied. You may leave these fields empty if you do not need them.
In the second section CONDITIONS you may set different conditions that will determine to which products apply the discount. If you do not select any options the rule will be applied to all the products in your store. Please note that words ALL and TRUE are clickable and you may change them to other options.
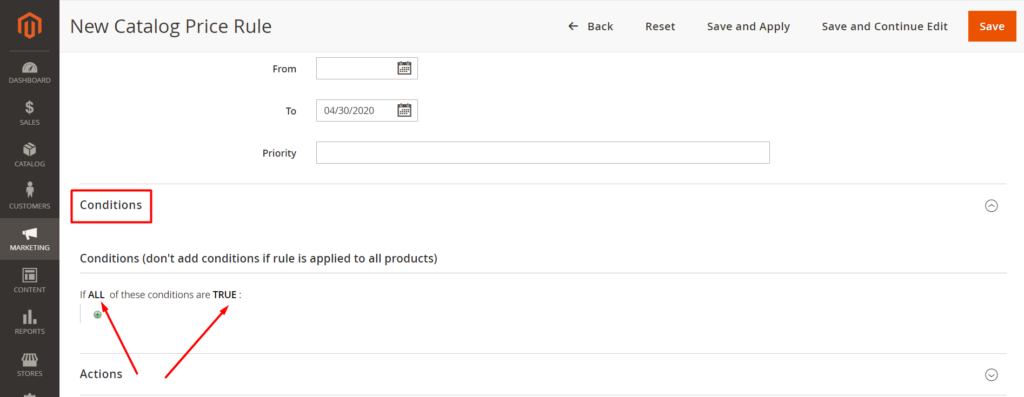
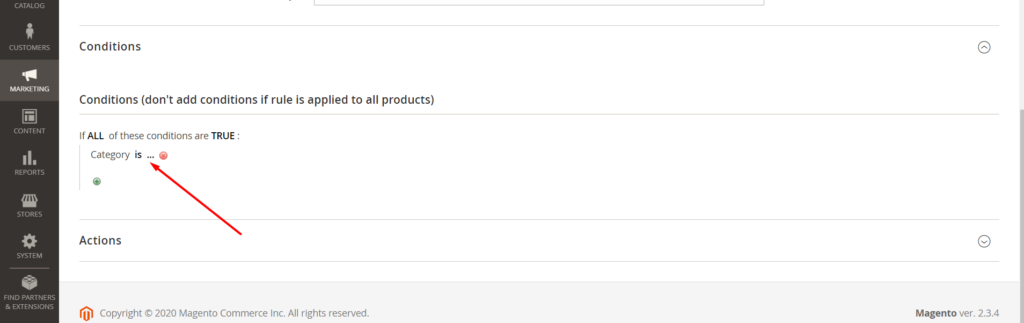
To add a new condition click plus sign and choose a necessary condition from the list. After that click 3 dots sign to choose the option. Please note that word IS is also clickable, so you may change it to another option.
The conditions are based on the attributes. If there is no necessary attribute in the dropdown you need to add it there. For this you have to enable option USE FOR PROMO RULE CONDITIONS for the attribute. You may find details on how to do it in our article.
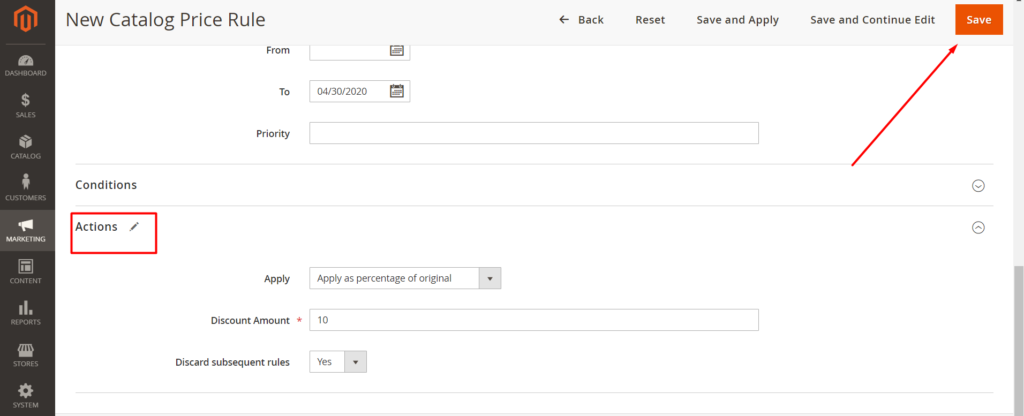
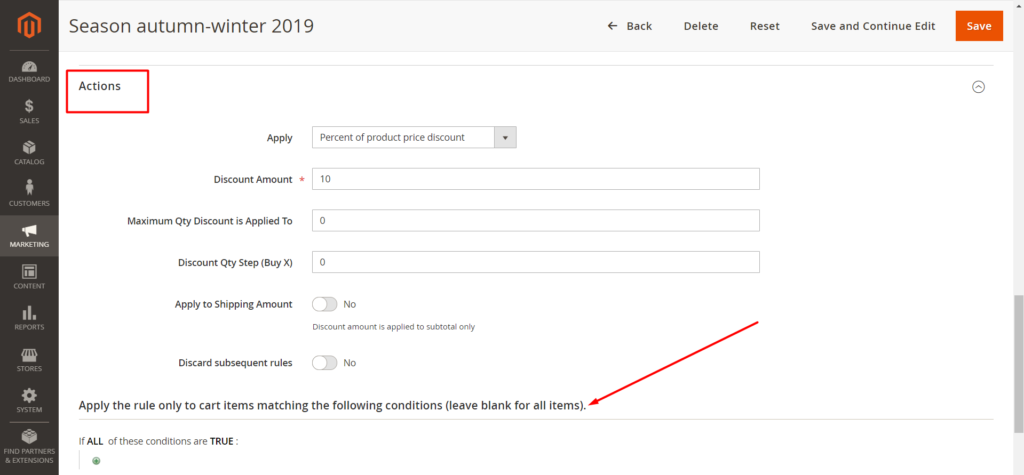
In the third section ACTIONS you may choose the type of the discount and set the discount amount. There are 4 types of the discount:
Apply as percentage of original – the discount percentage will be subtracted from the original product price (i.e. without any special/tier/group pricing or promotional discounts). For example, if the original price is 20$ and the discount amount is 10, the final price will be 18$ (or 20$*90%)
Apply as fixed amount – the fixed amount will be subtracted from the original product price. For example, if the original price is 20$ and the discount amount is 10, the final price will be 10$ (or 20$-10$).
Adjust final price to this percentage – the final price will be calculated as the percentage from original. For example, if the original price is 20$ and the discount amount is 10, the final price will be 2$ (or 20$*10%).
Adjust final price to discount value – the number entered in the discount amount field is the final price. For example, you enter 1$, so your final price will be 1$ no matter what was the original price.
In the field DISCARD SUBSEQUENT RULES you may choose whether you wish to apply only this rule (by choosing option YES) or all the rules that fulfill the conditions shall be applied (then leave NO).
Once all the changes are made press SAVE button.
If you see notification that the rule is not applied click button APPLY RULES.
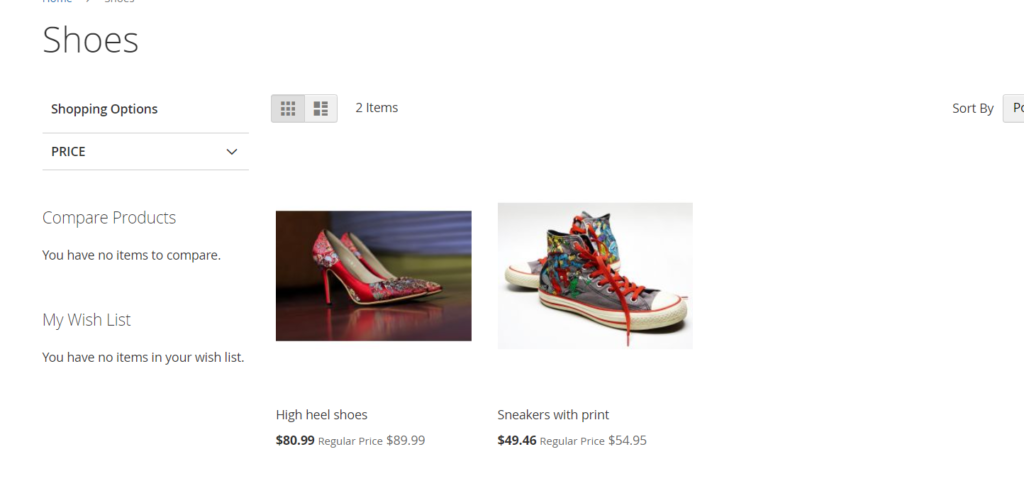
The discount will be applied to all the products that meet the selected conditions.
2. To create a rule which will display a discount in the cart or checkout go to MARKETING in the left sidebar of your admin panel and in section PROMOTIONS choose CART PRICE RULES. Here you may edit existing rules by clicking on them and create a new rule by pressing button ADD NEW RULE.

The card of this rule is almost the same as previous one. There are only a few differences.
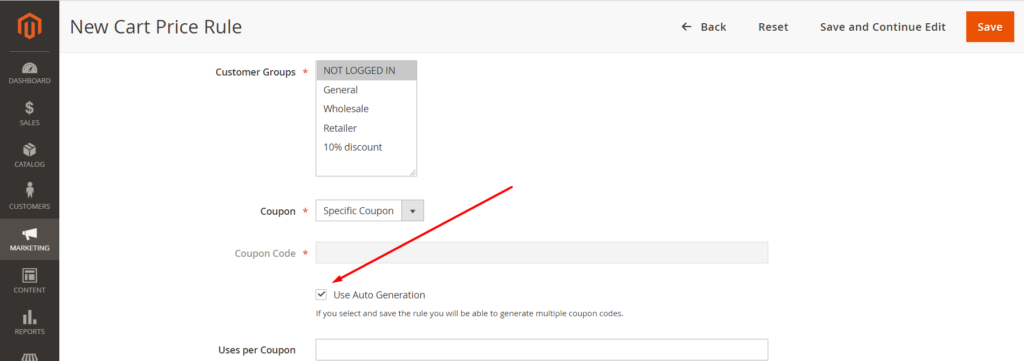
2.1. The first one is in the possibility to create coupon codes. To do it select SPECIFIC COUPON option in the field COUPON (otherwise the discount will be applied automatically as soon as the conditions are met).
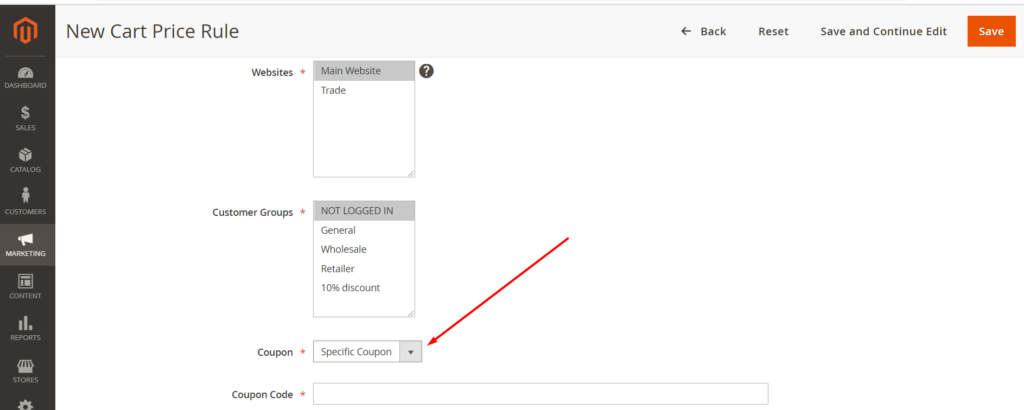
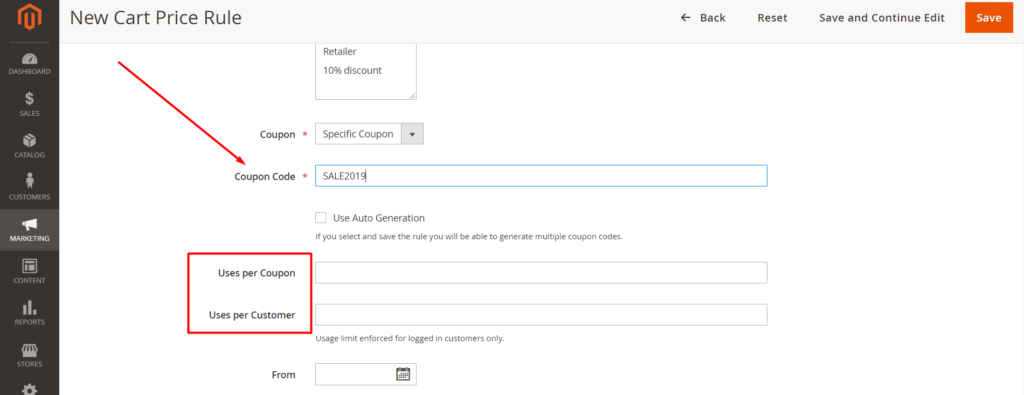
A new field COUPON CODE will appear. You may specify here a coupon which a customer will need to enter in the cart/checkout to get a discount. Also in the field below you may specify the number of uses per coupon and per customer.
Or you may automatically generate several different codes. To do it check USE AUTO GENERATION option.
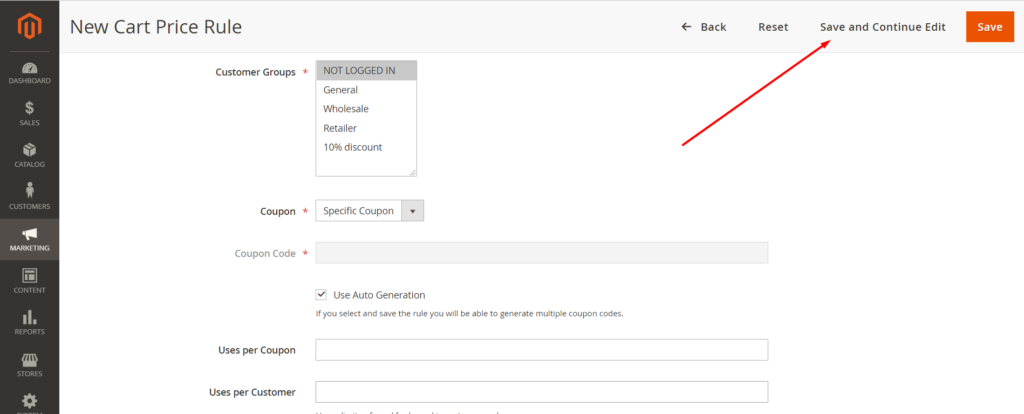
Then press SAVE AND CONTINUE EDIT button (this is needed to apply your changes so that the codes can be generated).
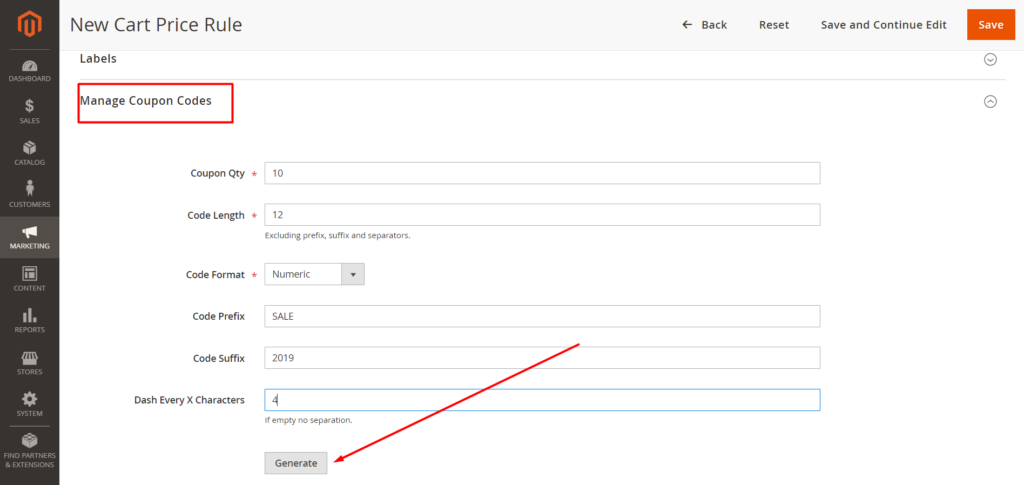
Then open the last section MANAGE COUPON CODES in this card and enter the general information on the basis of which codes will be created.
Coupon Qty – the quantity of coupons to be created.
Code Length – the quantity of signs in the created codes.
Code Format – could be text, numbers or mixed.
Code Prefix – the beginning of the code which will be identical for all the coupons. Is not included in the code length. You may leave this field empty.
Code Suffix – the ending of the code which will be identical for all the coupons. Is not included in the code length. You may leave this field empty.
Dash Every X Characters – number of signs separated by dash in the code. You may leave this field empty.
Then press button GENERATE.
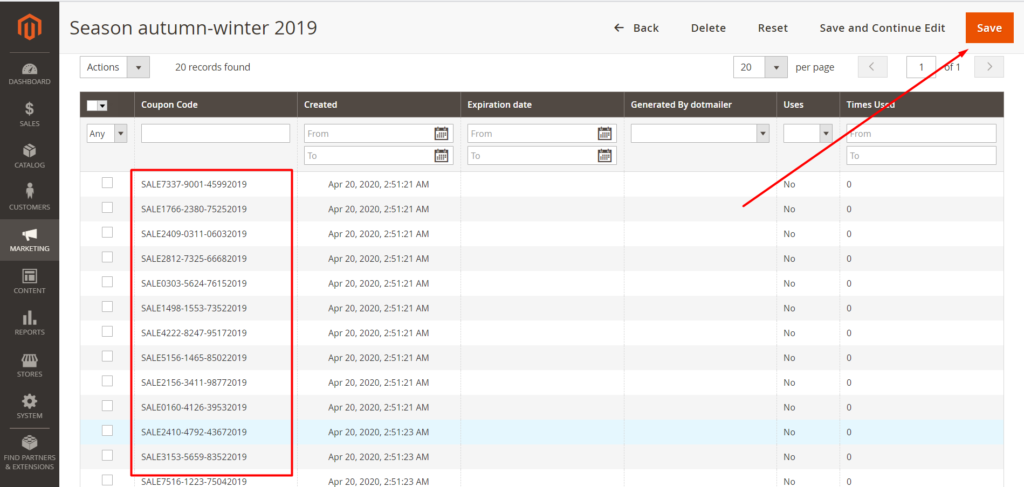
Please note if you see “Rule is not defined’ message it means
that you skipped the saving step described above
In the table below you will see coupons generated.
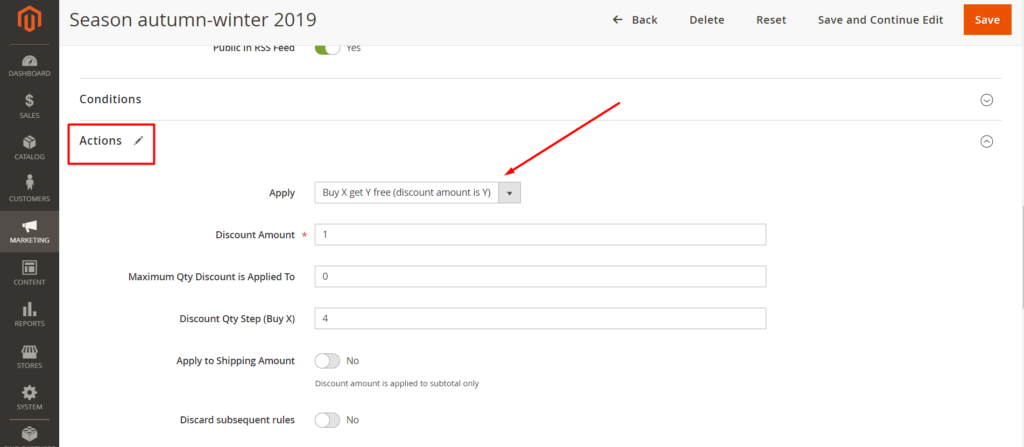
2.2. Another difference is in ACTIONS section. Here you may choose not only percent or fixed discount amount but there is also BUY X GET Y FREE promotion. It will allow your customers to get Y quantity of a product for free if they buy X quantity of this product.
To configure this promotion you need to specify the following fields:
Apply – select Buy X get Y free option.
Discount Amount – Y quantity of a product (which customers will get fro free).
Maximum Qty Discount is Applied To – limit the number of discounts that can be applied when the condition is met. For example, enter 1 to discount only one item.
Discount Qty Step (Buy X) – X quantity of a product (which customers need to buy).
2.3. One more difference is that this rule can be applied either to the whole cart when the conditions are met (in this case you need to configure CONDITIONS section) or only to separate products in the cart (in such a case please ignore CONDITIONS section, all the configurations shall be set up in an appropriate block in ACTIONS section).
In ACTIONS section there is also a block regarding free shipping promotion which is described in details in another article Complete overview of free shipping in Magento 2.
2.4. The last difference is in the LABELS section where you may specify the name of the discount which will appear in the cart/checkout. You can enter one label for all the stores or different labels for separate stores.

You customers may use the coupons created above in the cart or checkout.