So your developers created a great design for you with beautiful banners and blocks. But as time has passed, your promotion is over or you now have some new products you would like to show on those banners and now you need to change images, texts, links etc. But how do you do it?
.
1. What are Magento content blocks?
Most of the sections on the homepage are usually created as content blocks, although such blocks can be placed on other pages as well.
Content blocks are separate sections of content that can be placed almost anywhere in the layout. They can be also referred to as static blocks or CMS blocks. Such blocks are usually used to display banners, important massages, products of a particular type, posts, news, videos and so on.
.
2. Replacing the main elements in the HTML code
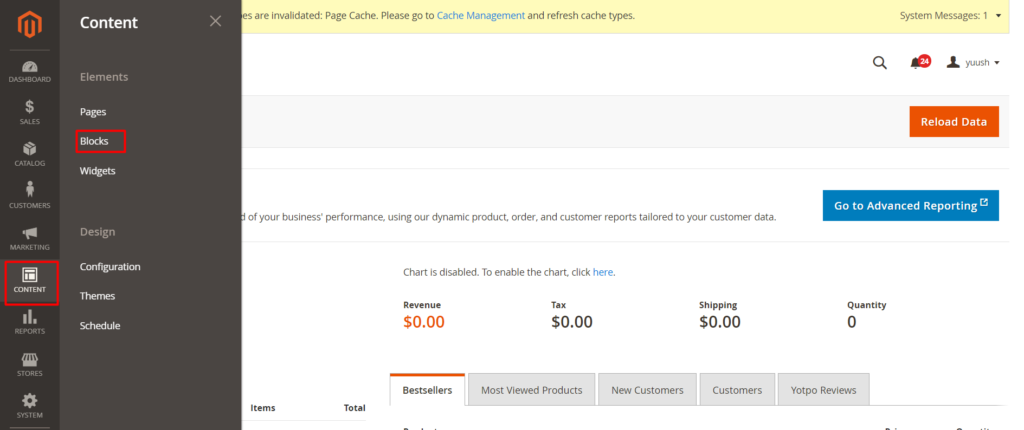
To edit the static blocks go to CONTENT in the left sidebar of your admin panel and choose BLOCKS.
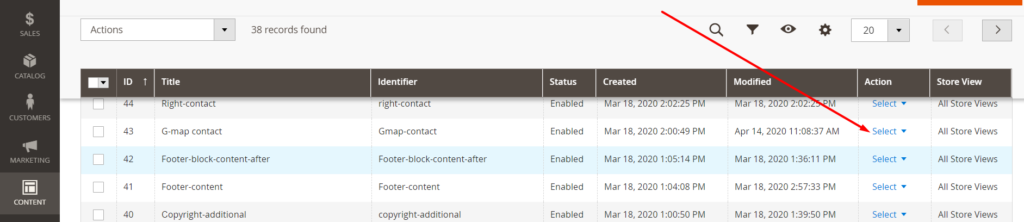
You will see the list of blocks which have already been created in your store. To edit a block, find it in the list and click on SELECT and then EDIT. Please note in this article I am only going to explain how to edit content blocks. If you would like to learn how to create them from scratch follow our blog updates.
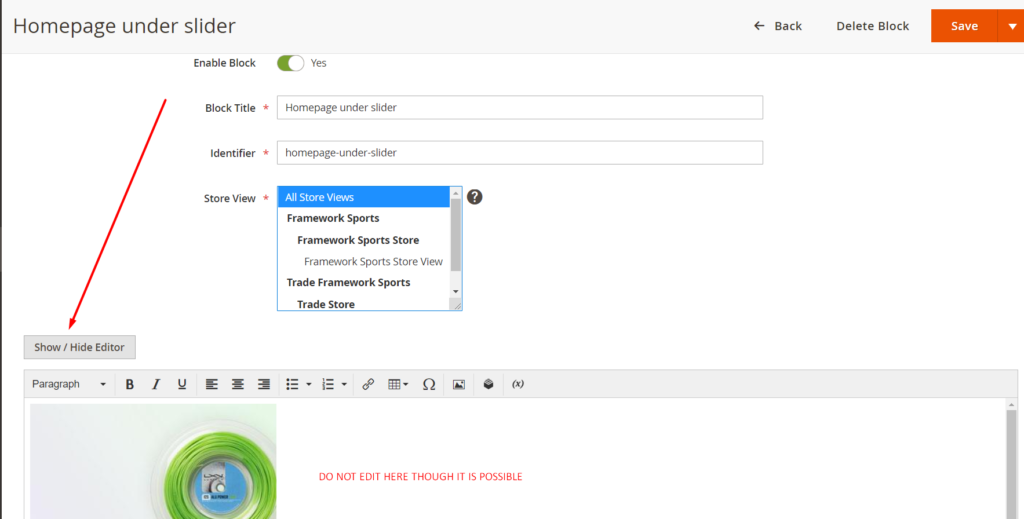
In the opened window you will see the field with the content (the same as it looks in your store). It is named WYSIWYG Editor which means ‘what you see is what you get’. Actually you may edit content here but be careful as you may accidentally remove the styles or formatting. It’s the quickest way to break your page on the website. Therefore do not change anything here but switch to HTML editor mode by pressing the SHOW/HIDE EDITOR button.
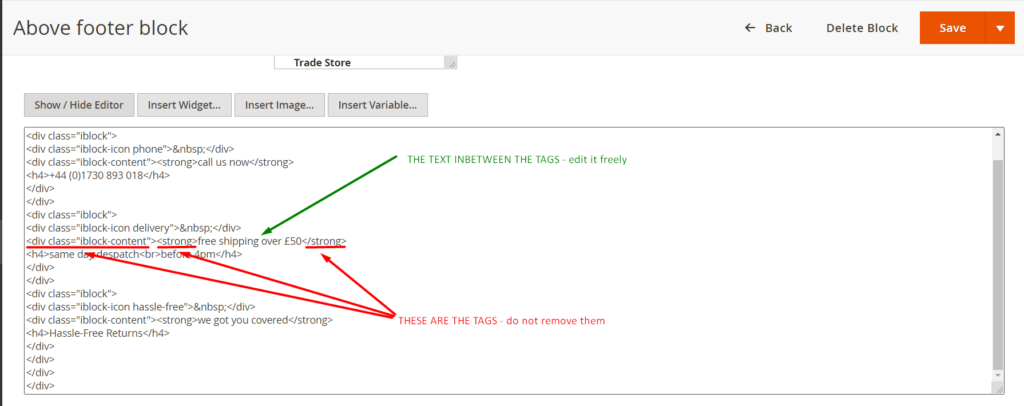
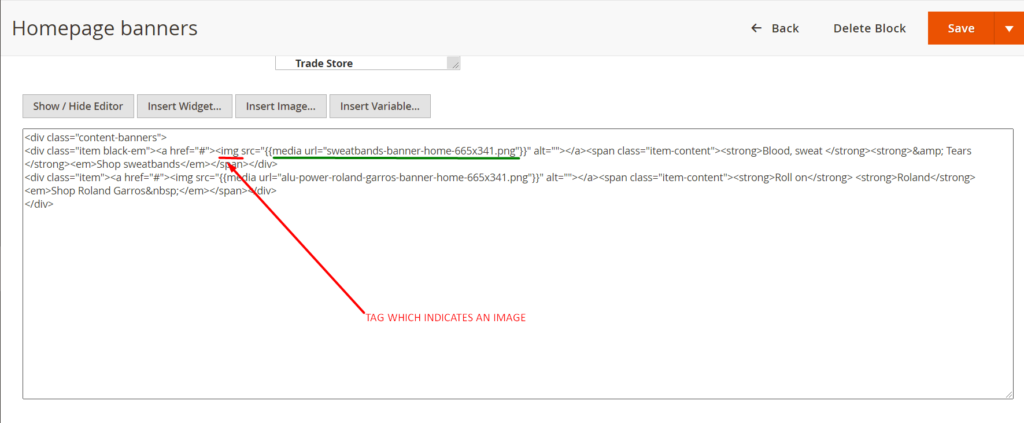
Now you will see the HTML code of your block. It is the same content but written as code. To be on the safe side make all the necessary changes here. And to answer your next question – no, you do not have to be a programmer. You just need to remember one simple thing – always keep all the tags (special HTML markup characters in triangular brackets) because it’s those that determine your formatting. Edit only the text between the tags in the code. This is the text that is visible on the website so you will easily find it.
Using this method, you will now be able to replace different parts of the text in your static blocks (including text on buttons). To change a link you will need to find the tag href in the code. The URL is placed after this tag inside the quotes. So remove everything inside the quotes and copy the necessary URL instead. In such a way you can link your block to any external page or any page of your website.

Tag img indicates an image. Again, you will need to replace the text but this time – the text in double curly braces. But first you need to find out how your new image is written in the code.
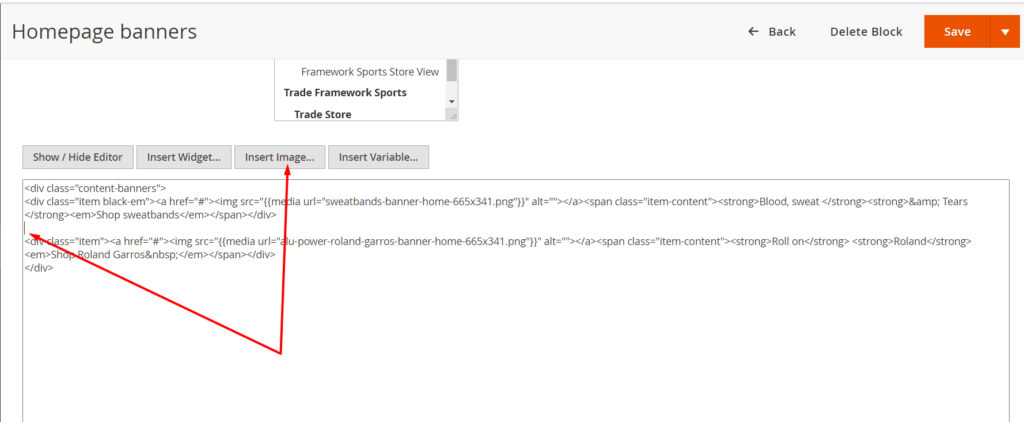
In order to do it, put the cursor in a separate empty line (you may add a line by pressing enter) and then press the button INSERT IMAGE.
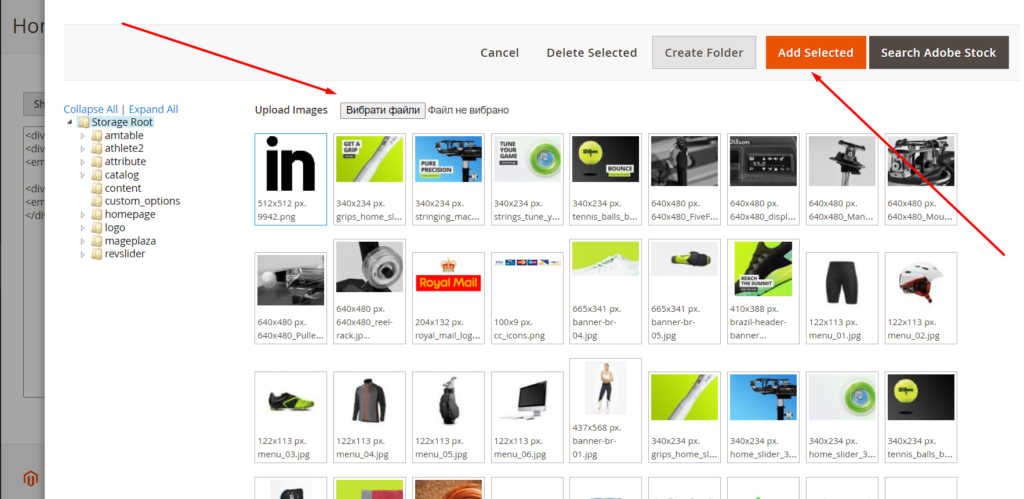
In the opened window you may select a picture from those that have already been saved on the site (for this just click on it) or upload a new one by pressing the UPLOAD IMAGES button. Then press the ADD SELECTED button.
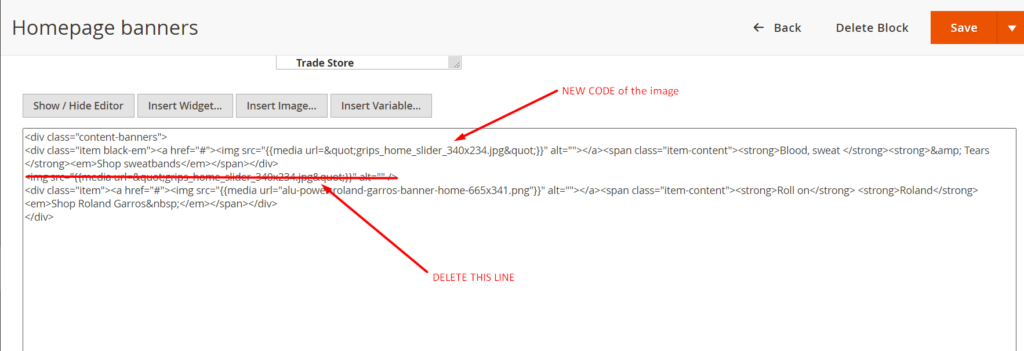
A special line of code which indicates this new image will appear in the editor. Now you need to copy the text inside the double curly brackets from this newly created line to the existing line.
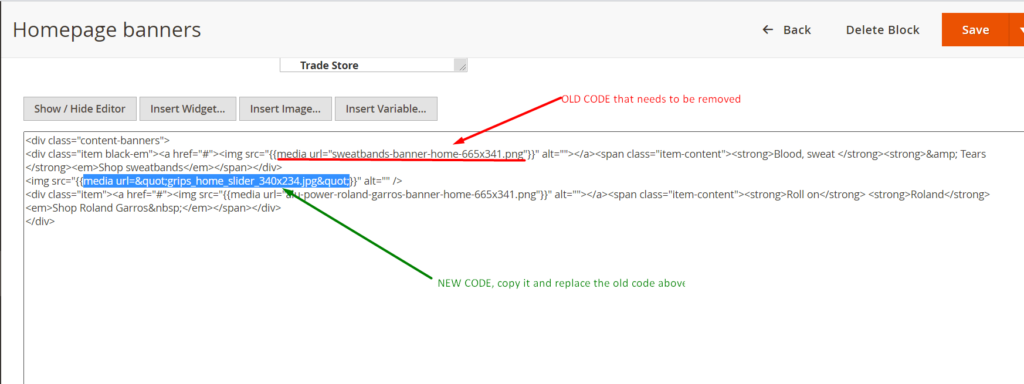
Once the code has been replaced do not forget to delete that newly created line.
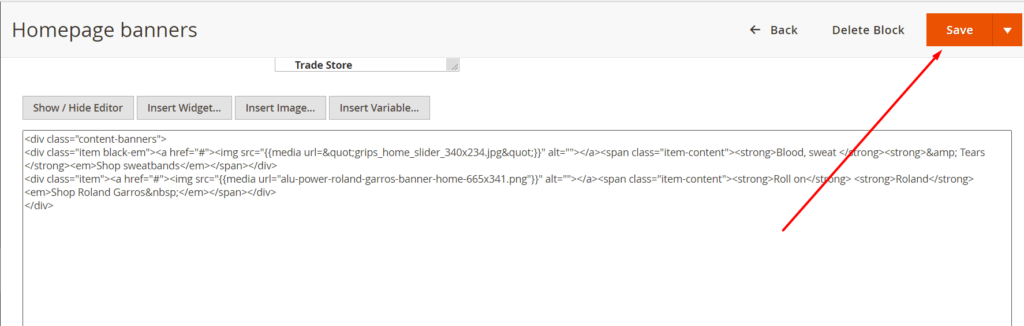
Save your changes by pressing the button SAVE.
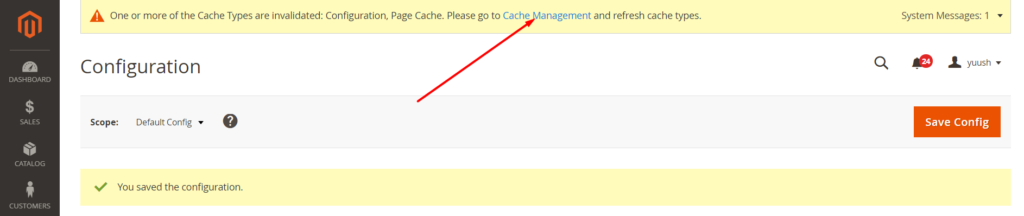
If a message about cache appears at the top of the page, click on the words CACHE MANAGEMENT which are highlighted in blue and in the opened window press the button FLUSH MAGENTO CACHE. Then go to your webpage and refresh the page to see the changes.
.
3. Editing CMS pages in the editor
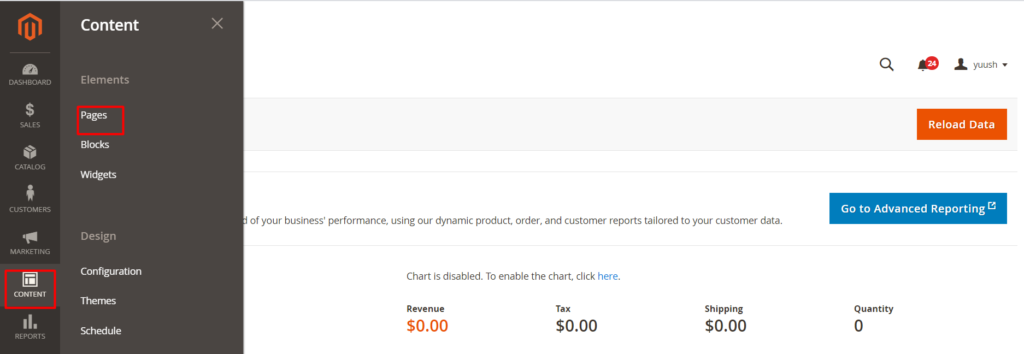
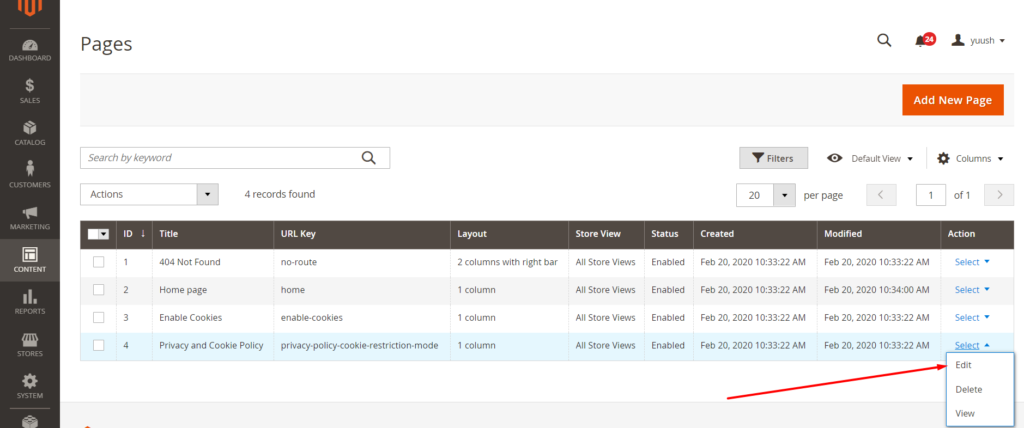
Are you still with me? Actually it requires more time to explain than to do. It could be complicated for the first time but its still worth learning as the editor in your admin panel can be used in many places – not only for static blocks, but some modules needed for content creation (for example blog plugins) will also use it. Moreover, entire pages can be designed with the editor. These are simple CMS pages (like About Us, Privacy Policy, Delivery Service, FAQ and many more) which are usually linked in the footer. To make changes to such pages go to CONTENT in the left sidebar of your admin panel and choose PAGES.
Find the required page in the list and click SELECT – EDIT.
All the recommendations from section 2 of this article regarding images, links, texts and tags are valid here as well. But I will give you a couple of hints that can be useful for you.
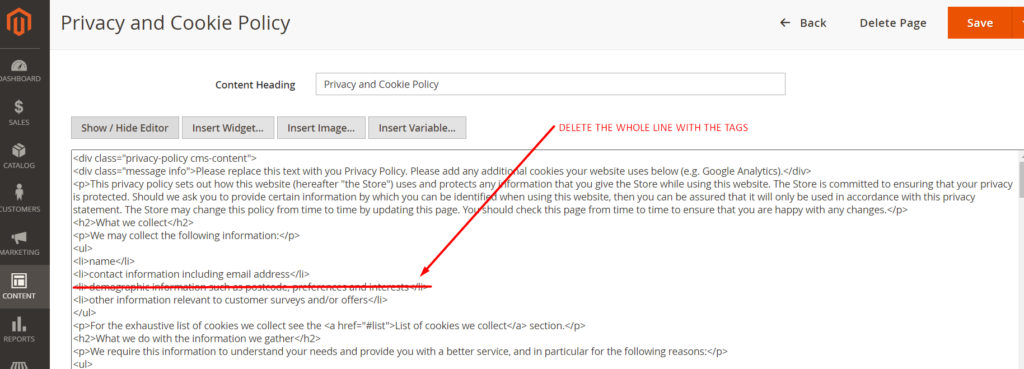
If you want to replace some element it’s necessary to keep all the tags. But what if you decided to remove it at all? Let’s suppose that you need to delete some piece of text like a paragraph or an item in the list. In such a case you have to delete the tags along with deleting the text inside the tags.
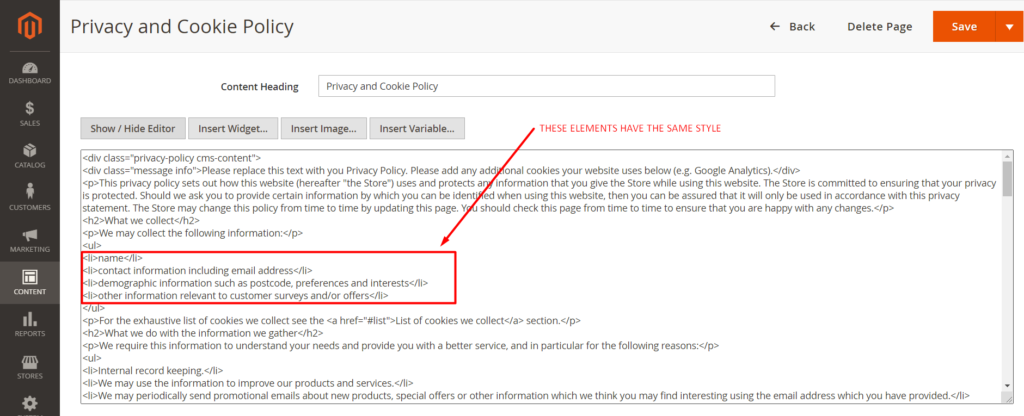
If you wish to add a new paragraph, heading, etc., you will need to find an existing element with similar formatting and copy it together with all the tags.
Once all the changes are made press the SAVE button.