Product attributes are the features, characteristics of the product that give your customers more information and can be used for filtering, searching, comparing, promoting etc. purposes. There are dozens of attributes provided in Magento 2 by default (including price, product name, quantity, SKU and many others) but there is also a possibility to create new custom attributes.
.
1. How to create product attributes?
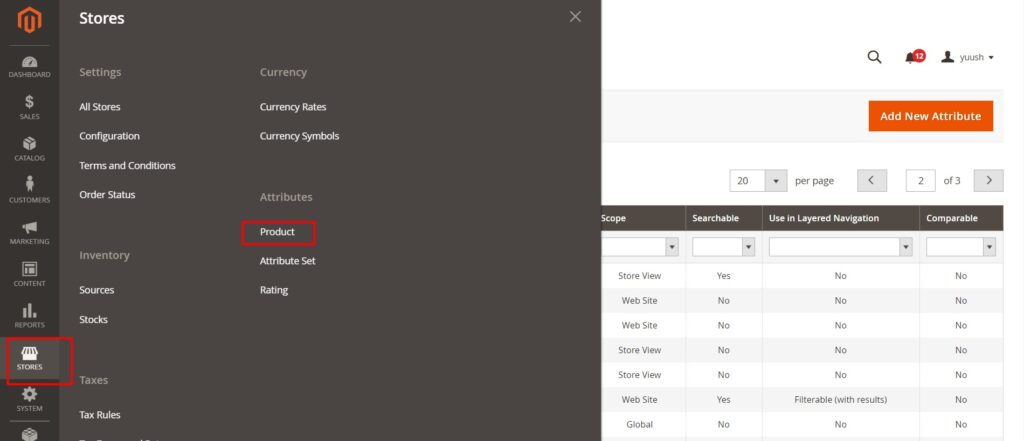
Go to STORES in the left sidebar of your admin panel and in the section ATTRIBUTES choose PRODUCT.
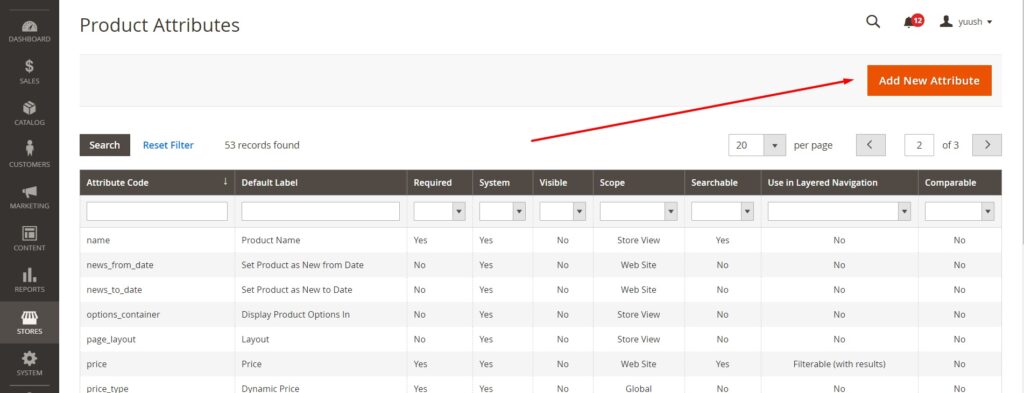
Here you will see the list of all attributes created in your store. You may edit the existing attribute by clicking on it or create a new one by pressing button ADD NEW ATTRIBUTE.
To create an attribute it’s enough to fill in ATTRIBUTE PROPERTIES section in the PROPERTIES tab.
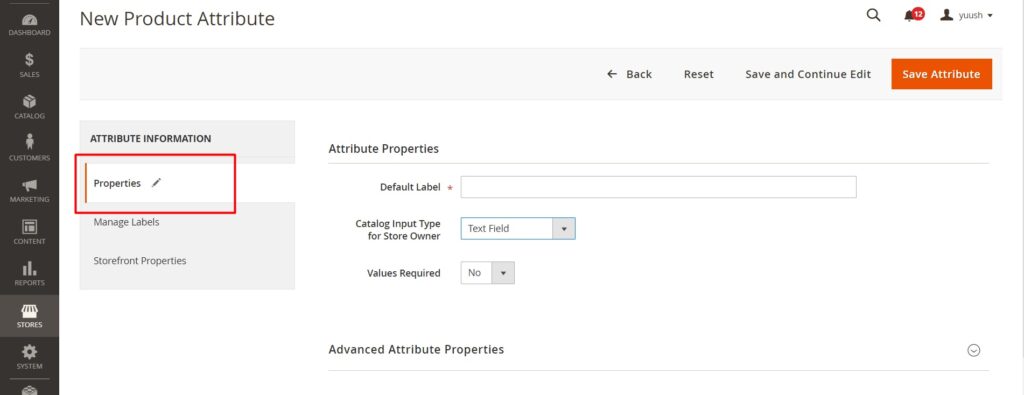
Default Label – just the name of the attribute.
Catalog Input Type for Store Owner – here you may select the option which will determine the data, field type of this attribute and its view in the store (for instance text field, date, price, dropdown etc).
Values required – if you want the value of the attribute to be chosen before saving the product, set YES.
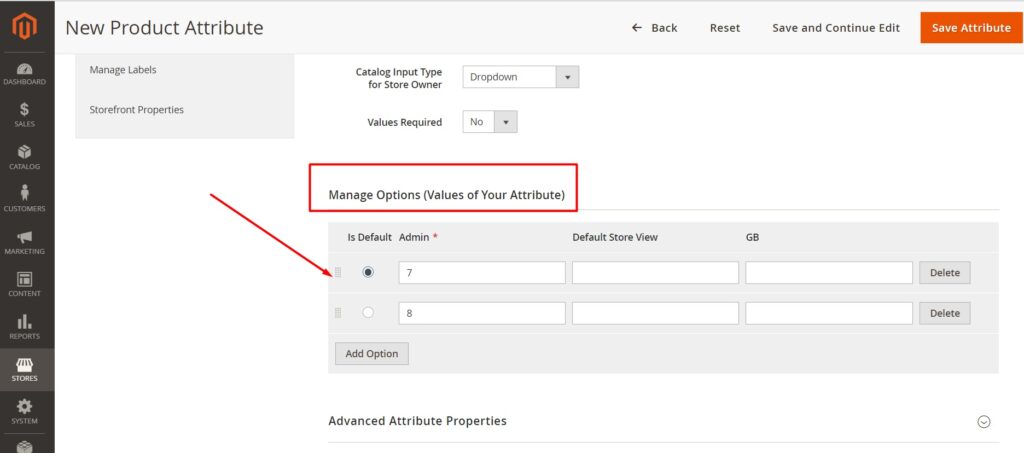
Please note if you select DROPDOWN, MULTIPLE SELECT, IMAGE SWATCH or TEXT SWATCH options the additional section MANAGE OPTIONS/SWATCH will appear. To add values there press button ADD OPTION/SWATCH. Check IS DEFAULT for the value you wish to be shown by default for all the products. To change the order of values (this will affect their order in the admin panel and in your website) use drag-and-drop button.
.
2. Where attributes can be used?
So now you may press button SAVE ATTRIBUTE, add this newly created attribute to the attribute set (see section No. 3 of this tutorial) and it will appear in the product card. But you’d better not stop there as Magento gives you a lot of ways to use the attributes efficiently. You may display them:
– on the product page – allowing your customers to choose different variations of products;
– on the catalog page – by enabling new filters and sorting options;
– in promotions – to specify the products for discount rules;
– in the admin panel – to better manage and organize your products.
Let’s look at these options in more details.
.
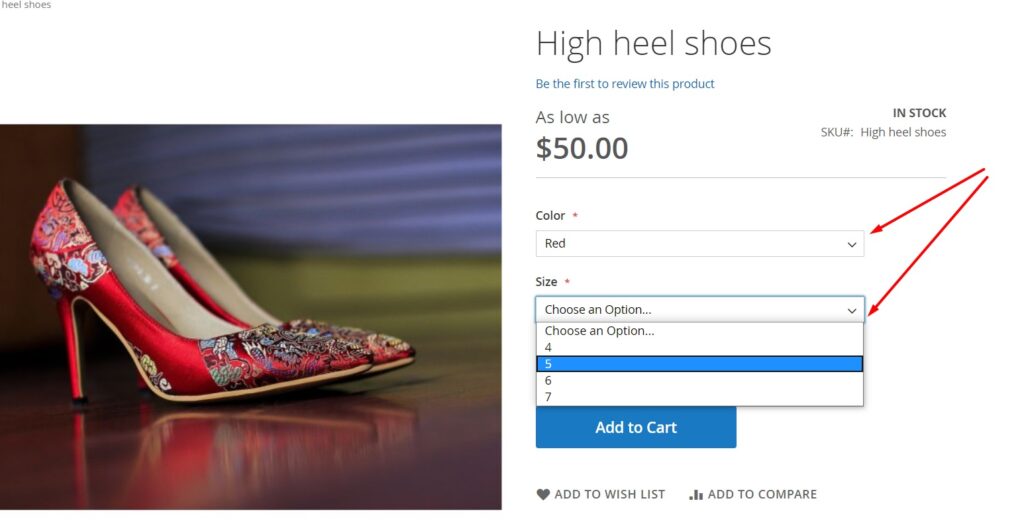
Creating configurations on the product page
Using attributes you may create different options for your products (like size, color, fabric etc.) and allow you customers to choose a desired option on the product page.
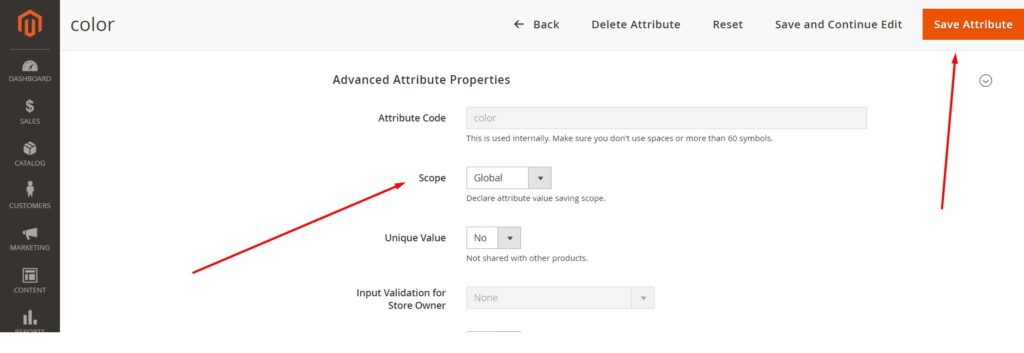
To do it first open your attribute in the admin panel and in section ADVANCED ATTRIBUTE PROPERTIES select value GLOBAL in field SCOPE. Then save your changes.
After this you will be able to create configurations for your product using this attribute. You may find a detailed step-by-step guide on how to create configurations in our recent article How to create configurable products in Magento 2.
.
2.2 Filtering and sorting on the catalog page
You may create different filtering and sorting options on your catalog page using attributes.
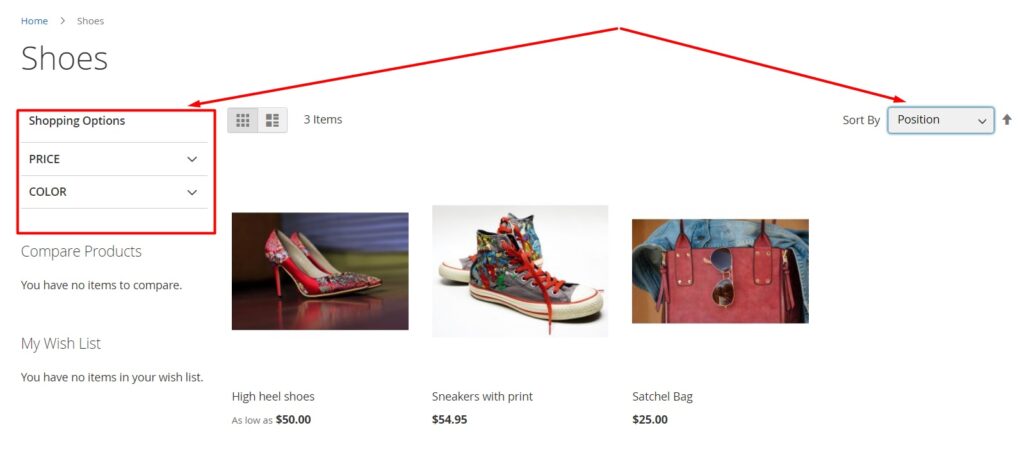
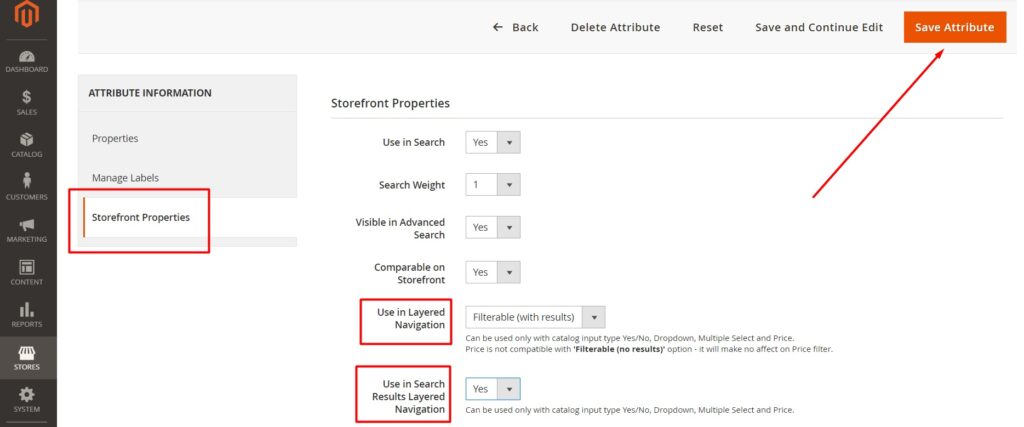
To add attribute to the filters in the left sidebar open it in the admin panel and in tab STOREFRONT PROPERTIES in field USE IN LAYERED NAVIGATION select one of 2 options:
– FILTERABLE (WITH RESULTS) to show only available values of the attribute, or
– FILTERABLE (NO RESULTS) to show all the values of the attribute, unavailable values will be crossed out.
In this case the attribute will appear on the regular category pages. If you wish to add it also to search results pages enable option USE IN SEARCH RESULTS LAYERED NAVIGATION. Then save your changes.
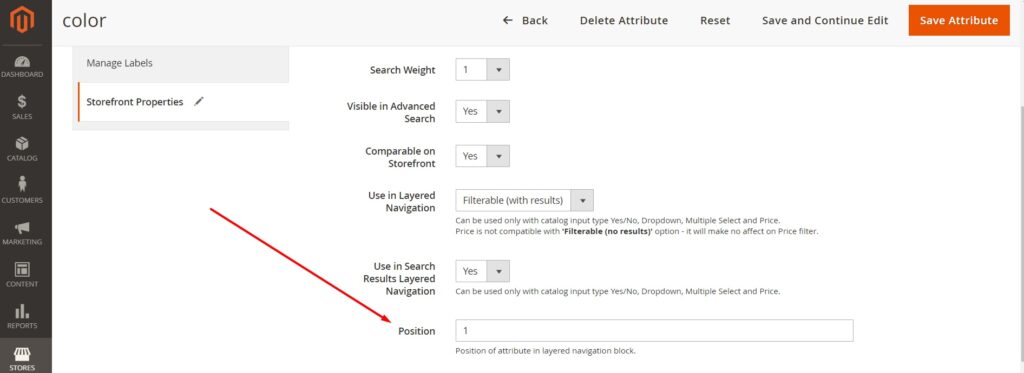
You may also set the order in which attributes will appear in the left sidebar of the category page by setting appropriate numbers in field POSITION for each attribute.
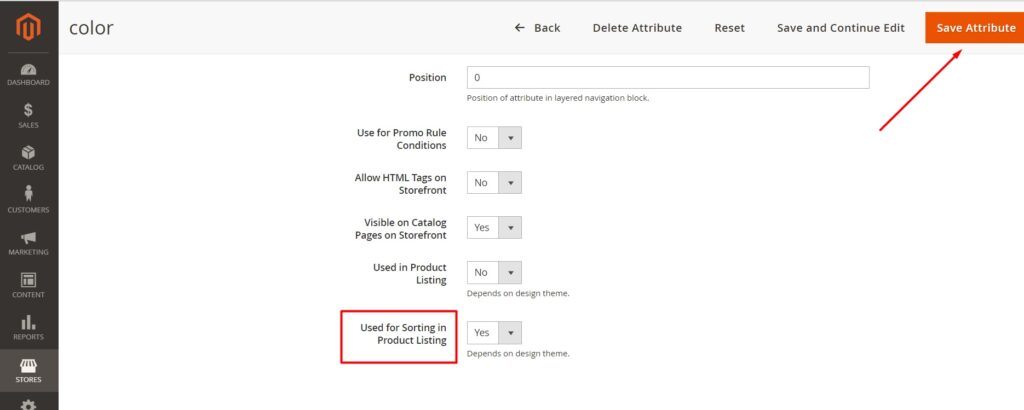
To add attribute to sorting dropdown on the category page enable option USED FOR SORTING IN PRODUCT LISTING in the same tab (STOREFRONT PROPERTIES). Then save your changes.
.
2.3 Creating promotions
Also attributes can help you to create better promotions for your customers. To find out how to create rules for promotions please see a separate article „How to setup discounts in Magento 2”.
In each rule there is a section CONDITIONS where you may set different conditions that will determine to which products apply the discount. So you may create a separate promotion only for products which have appropriate attribute (for example, 10% discount for black products only).
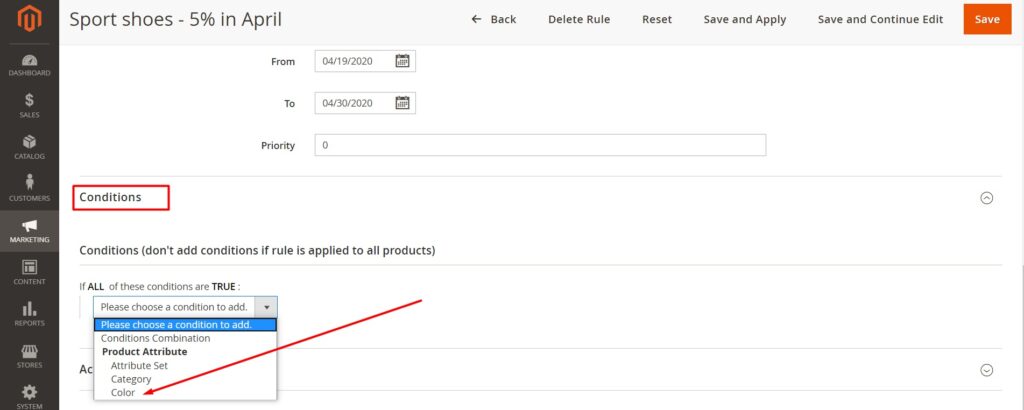
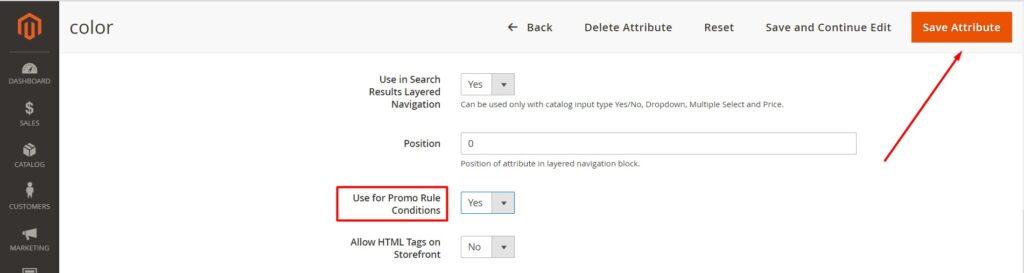
If you would like to add some attribute to the conditions dropdown open it in the admin panel and in tab STOREFRONT PROPERTIES enable option USE FOR PROMO RULE CONDITIONS. Then save your changes.
.
2.4 Filtering and sorting in admin panel
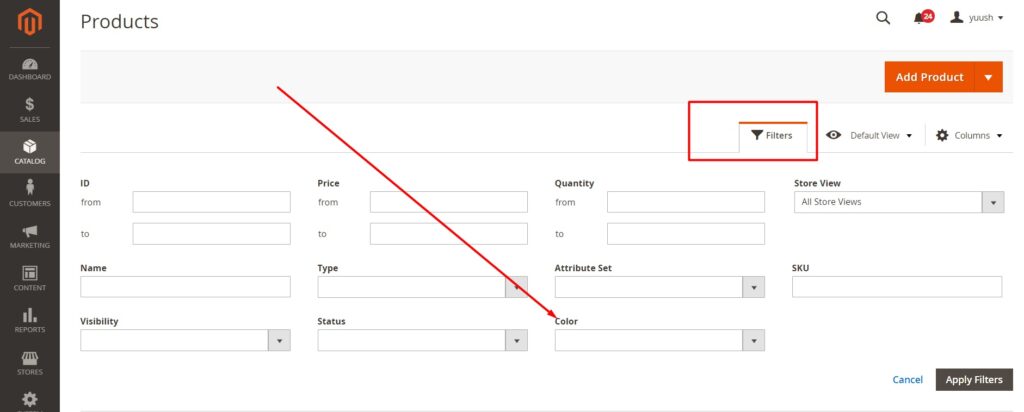
You may also use attributes to customize the view of products list in your admin panel (CATALOG – PRODUCTS). To do it open the necessary attribute and in tab PROPERTIES in section ADVANCED ATTRIBUTE PROPERTIES enable 2 options:
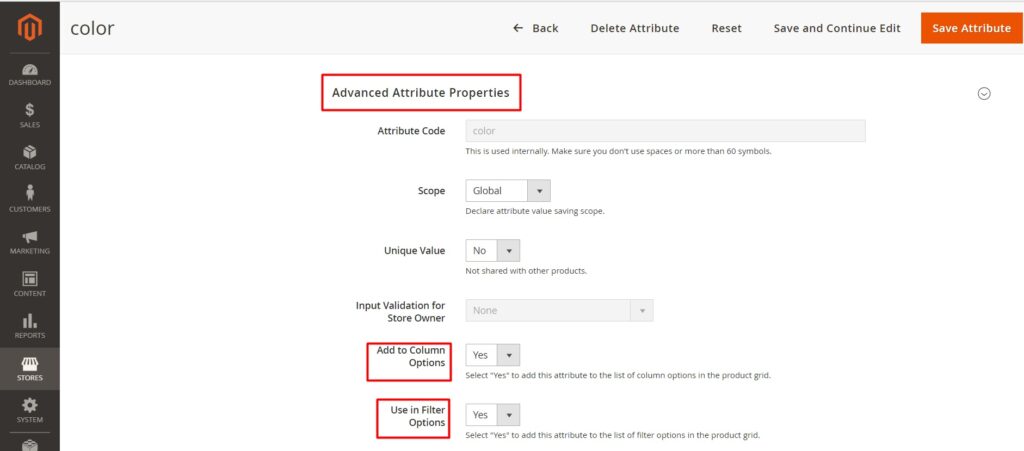
1) ADD TO COLUMN OPTIONS – the attribute will be added as new column in the products table.
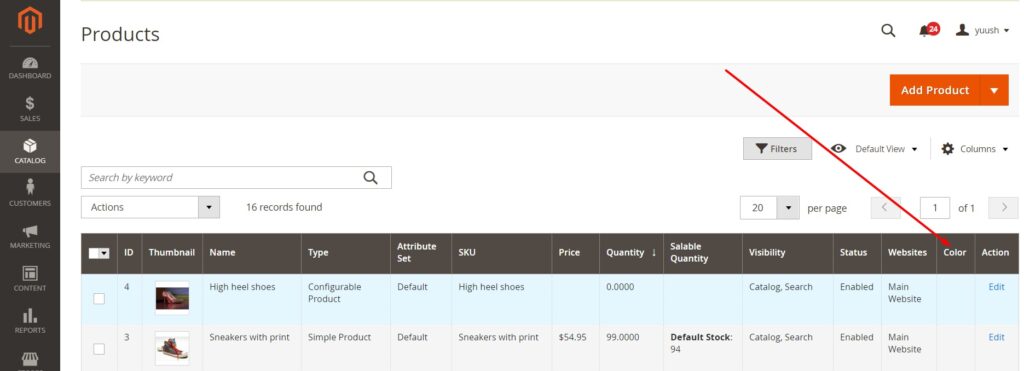
If the column didn’t appear at once you need to check it in COLUMNS dropdown.
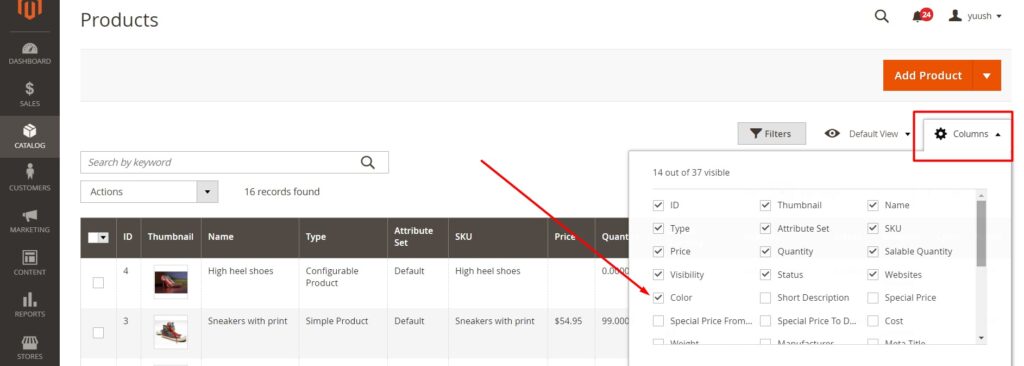
2) USE IN FILTER OPTIONS – the attribute will be added to filters.
.
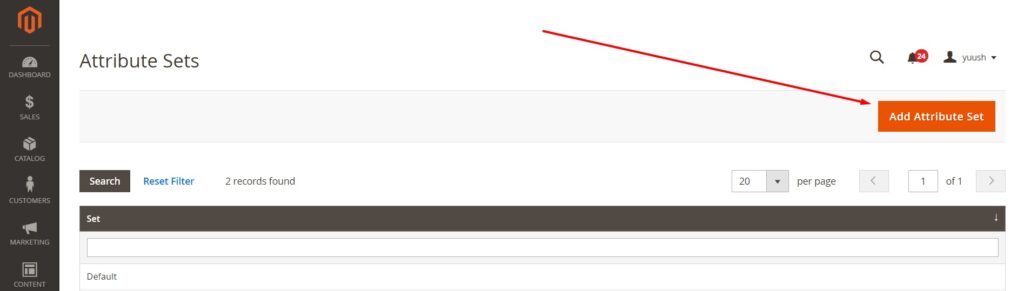
4. Attribute sets
Each product in your admin panel has a specific attribute set – collection of attributes which are assigned to this product and needed to determine the fields which will be shown for this product. The initial attribute set in your store is DEFAULT, you may use it for all the products. Or you may create a separate sets for separate products. In this case different product cards will have different fields specific only to this product. For example, attribute set created for shoes will have attributes brand, color, size. And a set created for presents will have glass, mechanism and brand attributes.
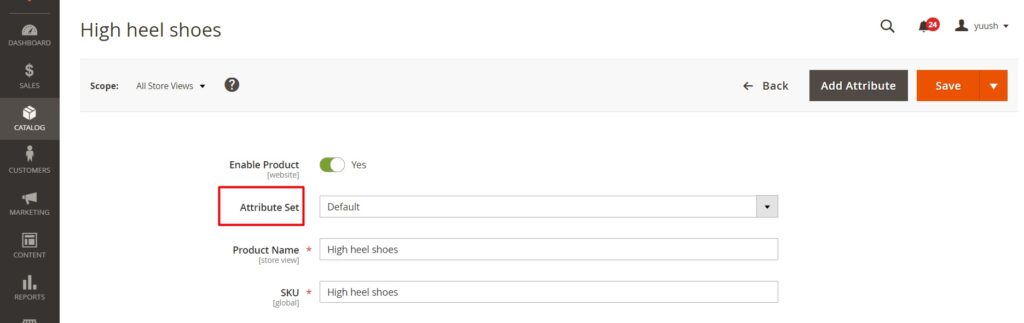
To add the attribute to the set go to STORES – ATTRIBUTE SET in your admin panel and choose the needed attribute set. In the opened window you will see the list of attributes which are already added to this set (in the column GROUPS) and the list of attributes which are created but not added to this set (in the column UNASSIGNED ATTRIBUTES). To add the attribute just drag-and-drop it to the GROUPS column. You may choose its position on the product card and even create a separate group for this attribute.
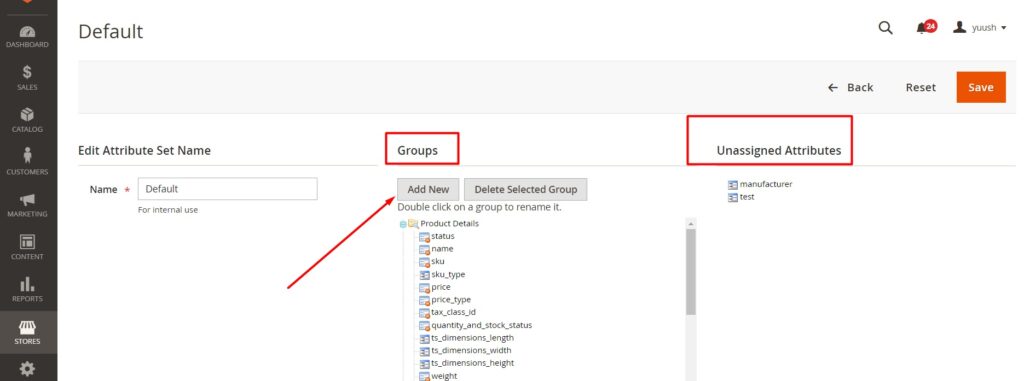
To create a new set press button ADD ATTRIBUTE SET and then add all the necessary attributes there.